Wednesday, August 13, 2014

Change #2 - Museum of Modern Art

     Ya, when I saw this for the first time - I just sat at my computer in awe for awhile.  It's funny when you get so busy working so hard to just make a dent in the vision you see for yourself in your head, that you get surprised when you get to the point where that vision is no longer IN your head.  (I really hope that makes sense.  lol)  So, to sum it up - I'm now selling my creations in the gift shop at the Modern Art Museum of Fort Worth and did a wonderful demo and trunk show there on August 1.
     I have to do a full hearted thank you to Lorri and all the staff there for making me feel so wonderful and special.  The patrons were amazing and so very interested in watching me create the cane that I was working on (future post - spoilers).   I talked until I had no voice - which wasn't very hard because I was coming down with a bug that kept me in bed the whole weekend afterwards.  I needed the rest though and sometimes being sick is the only way to force me to stop and get it.  It's just all so exciting and I want to make the most of every second of this wonderful life I've been given.
    If you want to visit the Modern Art Museum website you can click on the image above or visit there gift shop at http://shop.themodern.org.  Their online selection is limited, but visiting the store in person is definitely worth while if you're visiting the Dallas/Fort Worth area.

Tuesday, August 12, 2014

Soooo Busy... So many changes!!!

Magic Swirl Cane
     Where has Deb gone?  I'm sure that all of y'all (been in Texas too long) have been asking yourself just that.  It has been a crazy busy few months and when I haven't had my plate full of activities, I sit down to write something here and zzzzzz....  Well I guess I have to sleep sometime, but I really need to fill you in on all the wonderful changes in my life over the last few months.  I'll fill you in in detail over the next few days, but the first wonderful thing is that I was invited to be an instructor on CraftArtEdu!  I'm still in a state of disbelief about it.  I've taught classes and run craft groups, but I think most of the time when I write here or write a tutorial, it's more creative therapy for me.
     So - deep, dark, secret time - though I can handle group situations now (force of habit), I'm at heart a very deep-seated introvert.  And as such, I still suffer from the eternal question - am I welcome here, wanted, are people enjoying my company or am I just being a darn pest.  (seriously, I think this every day).  So, it was with more amazement than I think I could muster on my own that I accepted CraftArtEdu's invitation to become a instructor.  Though I think I still am a darn pest on a lot of occasions.  =)
Scrap Clay Bangle Forms
    Now that I've got that confession out of my system, I'll also confess that it absolutely drives me crazy to record my voice and listen to it!!!!  So be patient with me as I stutter along and I'll try not to ramble too much.
    Here are the two tutorials that I've already posted on CraftArtEdu.  They're both free, so just click on the link or on the photo and ENJOY!  Make sure to send me questions and any photos your have of your own work - I really truly enjoy both!!!  Magic Swirl Cane - This was shared on my blog in 2012 and Scrap Clay Bangle Forms was shared on this blog in December 2013.

Saturday, July 19, 2014

The Trees

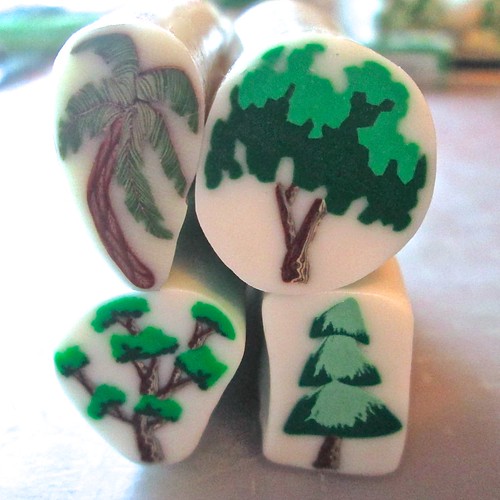
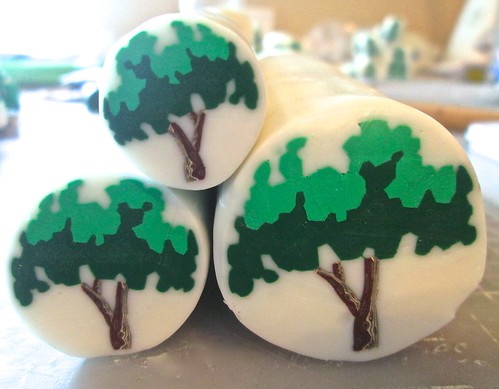
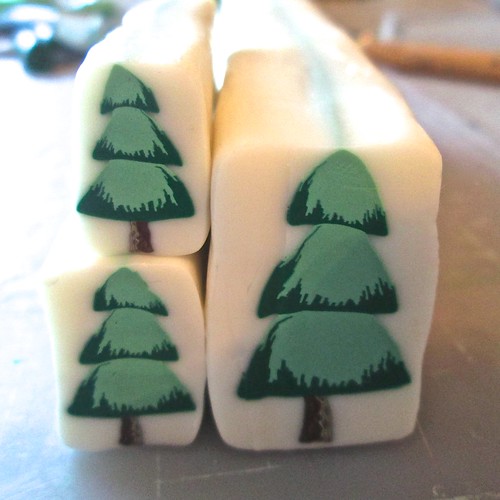
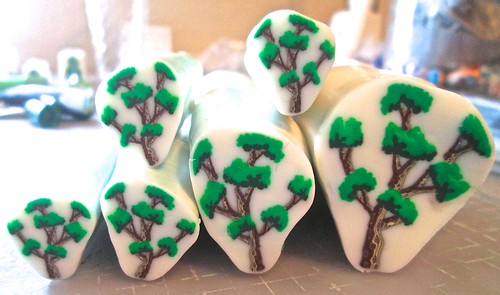
Four Tree Canes     I've created 3 more trees to go along with my palm tree cane. They are a fun leafy tree, a time-worn branchy tree, and a pine tree. These fun canes were also part of a large custom order and have been a wonderful edition to my cane selection in my ETSY shop.
     I've had so many, many people ask me about how I made these.  =)  And really, they're not hard at all, so let me tell you - these will be some of my first tutorials on CraftArtEdu.  I've been working on the details and learning the system and promise y'all that I'll let y'all know when they're done and live.  (Just don't laugh at my voice - I'm still adjusting to hearing myself!)
     There are so many ideas running through my head that I can use these for - country scenes, woodland scenes, or forest scenes.  They would be cute paired with caned houses or barns or with bears or moose for a Northwoods theme.  Maybe even throw in a lake, boat and a fishing pole.  =)  ...but I'd have to keep that one.  If you have ideas, I'd love to hear them!
Leafy Tree Cane - packed and reduced Pine Tree Cane - packed and reduced
Branchy Tree Cane - packed and reduced

Thursday, July 17, 2014

The Doors

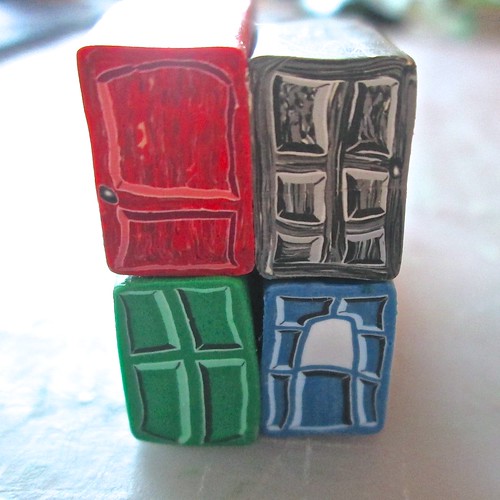
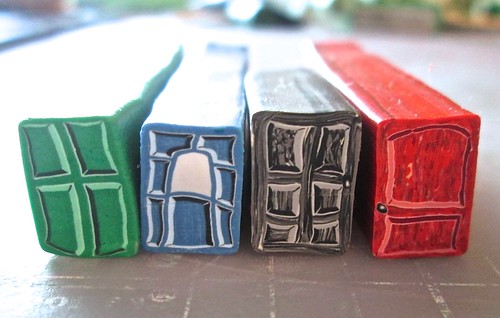
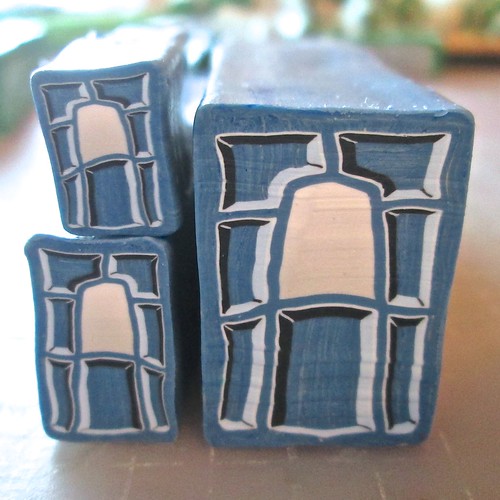
Four Door Canes     It's been a rather busy few months here for me and it's looking like it won't slow down for awhile now. =) It's exciting though! First off, the next few days, I'll be catching up on new creations - lots of fun new canes from a custom order. The first set of canes I'm showcasing today will be all my door canes.
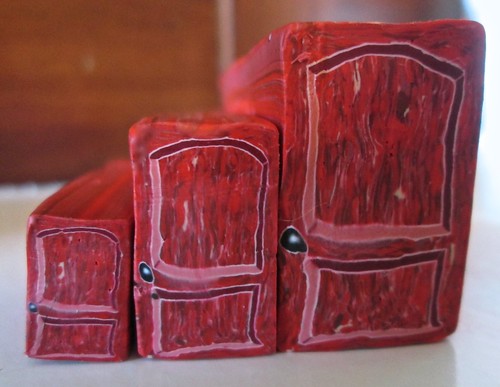
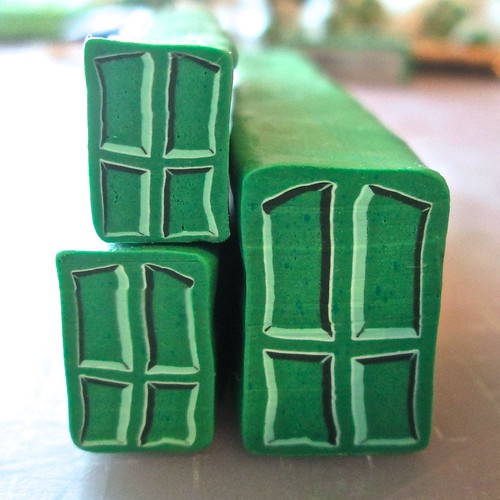
     There is lots to learn in making canes of doors and maybe the first how to minimize the natural distortion that comes from cane reduction in order to keep the lines straight.  There are several ideas I've experimented with during this caning adventure. The deeper you make the cane when first creating it, the easier it is to reduce without the edges warping and pressing the edges against a flat table top to keep the ends from drawing in helps TONS.  I'm also thinking in the future I may use a layer of scrap clay around the outside to help with reduction.  All in all though, these are meant to be whimsical and they succeed.  I did a bit of experimentation with the shading inside the door as well.  The glass in the door with the window is a light skinner blend of white and silver.   I'm looking forward to doing some experimenting with various house scenes and barn scenes and these will come in handy.
Four Door Canes     Now for all the news that is keeping me so busy.  First off, I have been invited by the folks at CraftArtEdu to become an instructor.  YEAH!  I've been teaching art and craft classes privately and professionally and running craft groups for almost 20 years.  Creating my own designs and sharing my learnings is one of my passions in life, so I think CraftArtEdu is a perfect fit for me.  I look forward to bringing new projects to the polymer world and I'll be sure to let all of you know about all my new adventures.   Secondly, I'm now selling my jewelry through the Museum of Modern Art in Fort Worth, Texas and will be doing a trunk show and demo on August 1 at their monthly First Friday event.  I'll be posting more about specifics of the demo in another post once I get my design all laid out.  It's going to be a great evening.  And there is a number 3 that was on my list, but that'll have to wait until later so I can give you all the details.  =)  Come August though, I'll need to catch up on my sleep.
Rustic Red Door Cane Rustic Black Door Cane
Rustic Green Door Cane Rustic Blue Door Cane

Wednesday, May 21, 2014

Kokopelli Kachina

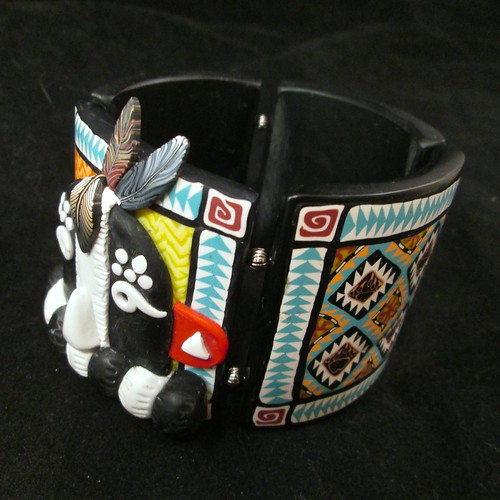
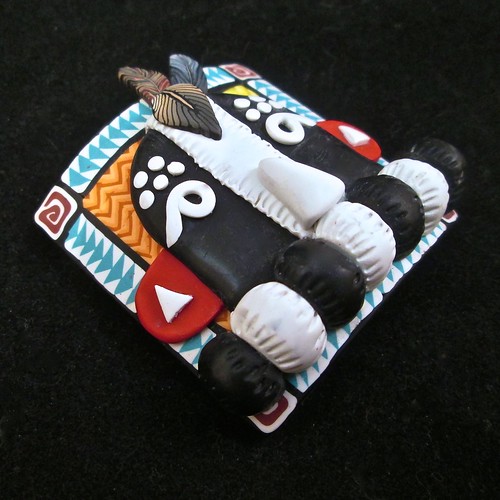
Kokopelli Kachina Tile Bangle     The Kokopelli is just revered as the herald of spring.  Native American legend says that his flute can be heard in the spring breezes, bringing an end to winter.  As he talks to the wind and sky, the sun comes out, the snow melts, the grass grows, and the birds and animals gather to listen to his songs.  He symbolizes fertility, happiness & joy, and is luck for hunters.  When this traveling prankster and seducer visits a village playing his flute, everyone sings and dances the night away.  When he leaves in the morning, the crops are bountiful and the women are pregnant.
     The Kokopelli has always been one of my favorite Native American images.  As you can see below, I have used the image not only in polymer clay, but also in my other artwork.  To me, he reminds me to celebrate life and all the joys it give you.
     In designing this little guy, I started - like my Clown Kachina - by attaching slices of my yellow and orange zigzag canes from my Sunface Kachina canes to a prebaked & sanded bracelet tile with the help of some Kato polypaste.  I then also added the border and corner canes from my Southwestern Bear Claw bracelet tiles.  While this background tile was caring, I cut out the face shape from scrap clay and covered it with a thin sheet of black clay.  I added a strip of white down the center and textured the edges, and then added the nose.  The eyes and eyebrow details were formed from thin extruded white clay and carefully shaped and attached.  The color was formed from white and black balls cut in half and pressed together with the help of a touch of Kato polypaste and then textured on the edges.  Once the background tile was cured and sanded, I pressed two feathers of different colors - one from each of my first two owl canes - to the top and then added the face, collar,  and red ears to the tile with some Kato polypaste to secure the bonds.   I placed an additional feather from my Sunface Kachina canes onto the forehead and white triangles to the ears as final touches.
Kokopelli Kachina Mask/Bracelet tile/Pendant Kokopelli Kachina Mask/Bracelet tile/Pendant
Kokopelli Kachina Mask/Bracelet tile/Pendant

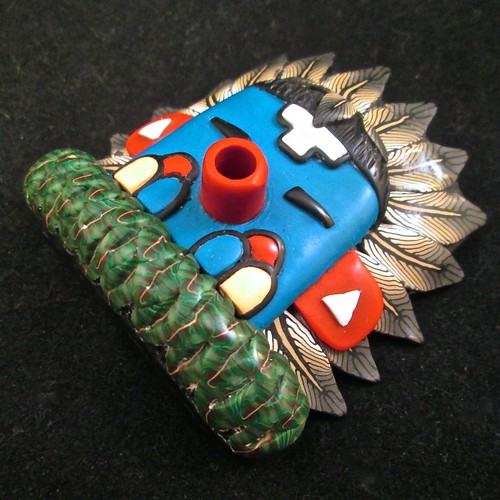
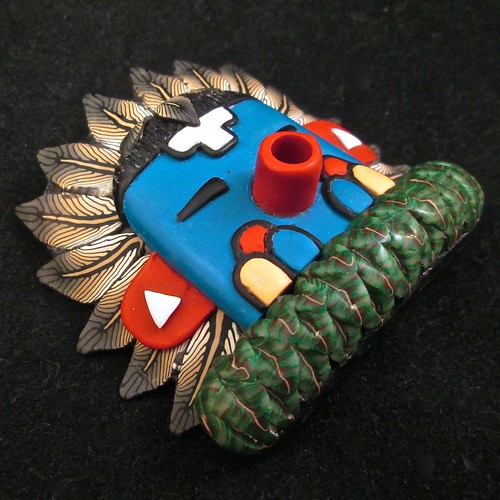
Morning Singer Kachina

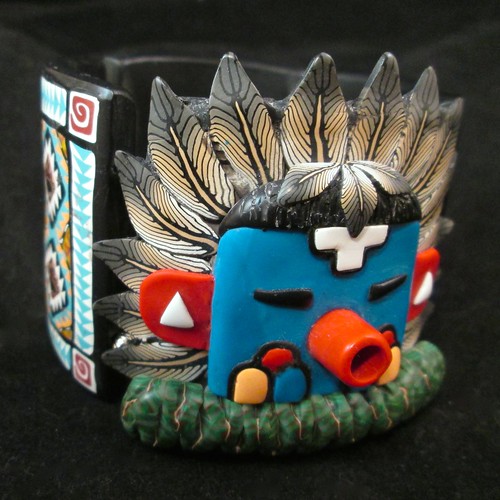
Morning Singer Kachina Tile Bangle     The Morning Singer Kachina or Talavai wake the Hopi people by singing in pairs from the rooftops.  During the day, they prompt the other kachinas and lead them in song.  They have a small spruce tree in one hand and a bell in the other.
     This is another of my favorites!  I love the colors and the dimension that I achieved from the design.  I started by building up the feather headdress on my lined, cured and sanded 2" bracelet tile.  I used feathers from my original Sunface Kachina, but in the future will design feather canes specific to each Kachina.   I filled in the center of the headdress and cured it along with a short ring of red clay around a crochet hook for the nose/mouth.  In the meantime, I cut out the head shape from a sheet of scrap clay and covered in with turquoise clay.  I then added the black hair on top and textured it.  The rest of the elements I wanted to add after curing the nose/mouth, so I proceeded to created the green color by placing thin layers of left over palm tree fronds around a tube of scrap clay.
   After the headdress base was cured and sanded, I attached the face and red ears to it with the help of some Kato polypaste.  I carefully inserted the nose/mouth with a bit of Kato polypaste as well and then added the eyes, the white reversed step on the forehead, and the colored oval shapes on the cheeks.  For final touches I lined the reversed step and ovals with a thin string of extruded black clay, added a white triangle to the ears, smaller feathers to the hair, and then attached the collar with the help of more Kato polypaste.  Time for a final cure, sanding, buffing and tah dah!!!!
Morning Singer Kachina Mask/Bracelet tile/Pendant Morning Singer Kachina Mask/Bracelet tile/Pendant
Morning Singer Kachina Mask/Bracelet tile/Pendant

Tuesday, May 20, 2014

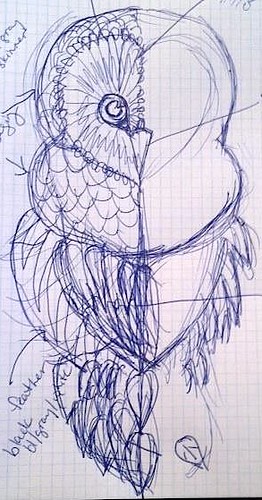
Owl Cane Take 2

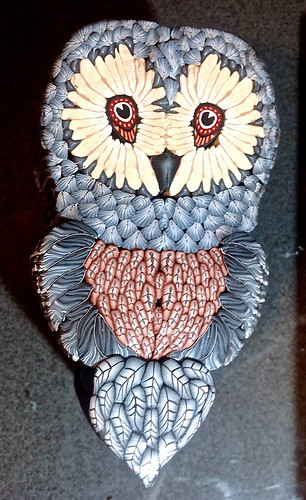
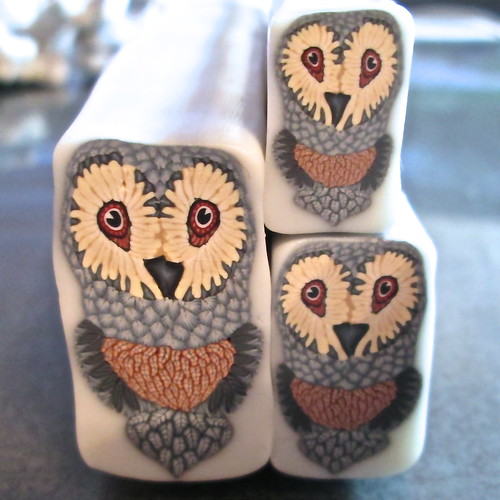
Blue/Gray Owl Cane - reduced   This is my second owl cane. I started with a different sketch and a different color scheme than the first.  I was hoping for a more subtle black, blue and gray theme with a hint of cream, but the colors of my component canes when reduced down to the size I was using in my own were much bolder in color that I was hoping for.   It's always a learning process though and eventually with enough practice I'll understand the amount of color I need in component canes for the look I'm after.  So that is the first challenge I faced in putting together my second owl cane.
     The second challenge was the clays I was using.  Most of the time for canes of this type, I like to look through my stock of leftover clays from other projects.  I guess it's that practical farm girl that still resides in my soul.  =) Most of the time it's a great use of my leftovers, but for this one I grabbed a bag of cream colored clay for the owl's face that was made from some clay that I was having issues with.  It conditioned well, seemed to
Owl Sketch #2Owl Cane
have the right consistency, but would split rather than reduce.   I didn't realize it was "that" clay until I started reducing the cane for the face and it started breaking into pieces rather than reducing.  I really should have just thrown it into my scrap clay jar at that point because it gave me issues in reducing the whole cane.  My frugal nature is the death of me sometimes.  lol
    Challenge #3 was the size.  I started out with a fairly small and shallow cane for this one, but have learned from the demand for my previous owl that a larger cane would be worth my time and easier to make and reduce.  So in the future I will buy more clay and start with a larger, deeper cane that reduces with less tlc.
    Challenges aside, I'm learning and all these challenges are necessary if I want to learn more about how involved complex canes of this nature are.  I've been working on a few dragon sketches, a griffon, and several southwestern animal motifs.  It may be a few months before I get time to tackle these, but I am excited about the new challenges ahead.

LinkWithin

Related Posts with Thumbnails