
 I've been working on a pretty big project lately that has me experimenting with several new ideas that I'm hoping will come together in a wonderful, miraculous way. One of those ideas is a Moon Cane. There are several design questions that need answering in making this cane. What color do I start with and will it look more realistic with the light being in the center or on the outside? I want this cane to be extremely easy to make so how to I make the concept of craters or shadows look realistic without making the cane piece by piece like I would a picture. What is the proper balance of light to gray in the shadows so they're visible but not focal?
 My first trial was a miserable failure! Though I like the colors of the piece and overall design, the moon didn't look anything like what I was picturing. I started with two skinner blends, one yellow and white and the other yellow, white and black with the black being darker toward the yellow end. I tried to shape where I cut out the shadows and obscure the edges with bits of my darker end of my skinner blend with the black, but the darker blend was too much of a contrast and the edges too distinct. You can see the results in the little piece to the right and the finished piece below.
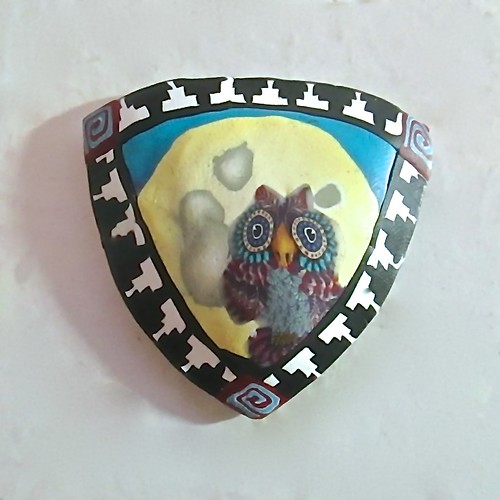 My second attempt was a success, as you can see from my finished trial piece above. The cane doesn't make an exact duplicate of the moon, but gives a good artist likeness for my jewelry pieces. The following tutorial will be part of my upcoming CraftArtEdu class, "Midnight Owl Inro." It's a very detailed class made for those of you comfortable with caning and looking to advance your skills. It included instructions on how to make a custom inro form, how to make the owl that is pictured in the pieces on this blog post, how to make a moon cane and various other simple canes, and then how to put them all together in a very detailed, layered millefiori inro.
 Today though, I'm going to share with you the instructions for my simple moon cane.
THE MOON CANE
 | 1) Roll out a 2 1/2" square sheet of white clay on the thickest setting of your pasta machine. Cut a 1/4" right triangle from the bottom edge as shown and replace it with yellow clay. | |

| ||
2) Form your Skinner blend into a plug with the yellow in the center and the white toward the outside. Flatten the plug to 1/2" height.
| ||

| 3) Roll out a 2" square sheet of white clay and cut out a 3/16" right triangle and replace it with yellow clay. Lay two 1/16" black snakes across the blend to tint it toward the gray. Accordion fold your tinted Skinner blend into a block. | |

| ||
4) Cut two 1/4" circles from your Skinner Plug in the upper left corner and one 3/16" circle in the lower right corner as shown. Make 3 short cuts from your upper two circles, one in the far right upper going to the right and two in the left going down.
| ||

| 5) Using a small rod, open the cuts and stretch your openings into a moon shadow shape. | |

| ||
6) Chop up the circles you removed in step 4 and half the tinted Skinner block into a fine pile of mixed colors.
| ||

| 7) Pack your chopped up mix into your moon shadow openings. | |

| ||
8) Reduced the cane and create! You'll notice in the picture that by using a chopped mixture you will get a random pattern to every slice on your cane, but it also gives soft edges and a hint of shadow and texture. This is a very small cane, but if you were to make a larger cane, the shadow and texture would be finer with more shadow definition.
| ||
 |  |
Amazing work, I love the moon, the owl, the border,...everything!
ReplyDeleteThank you, Ana! =)
Delete